Hello and welcome! In this post, I am going to explain to you how you can install Lightroom presets on your desktop and mobile devices. Once you know how to do it, it is very easy and you will be able to edit your image within seconds. So without further ado, let’s install some Lightroom presets!
Desktop
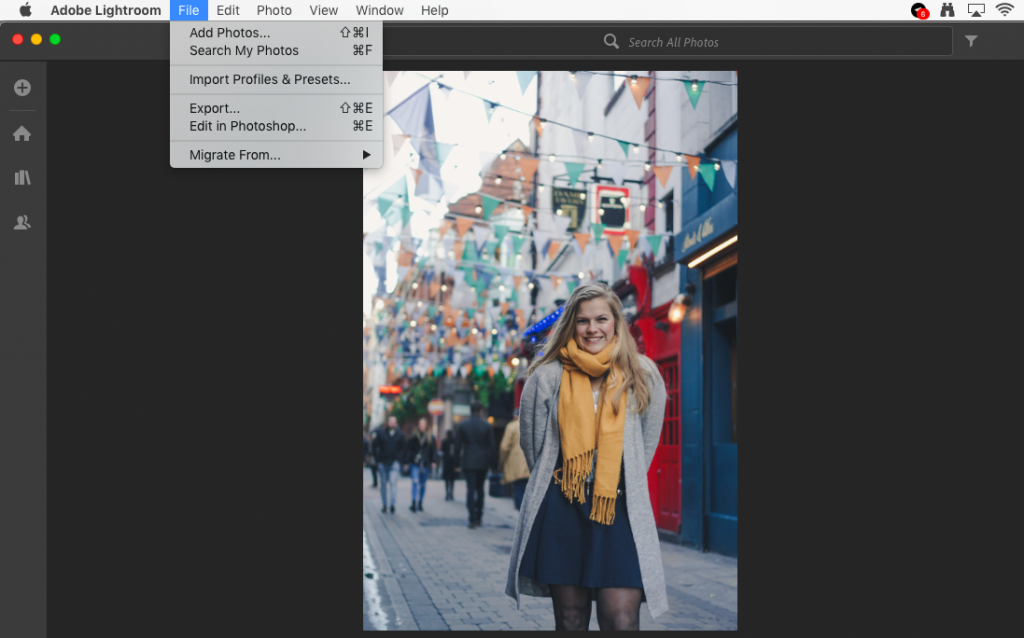
To install a preset to your desktop version of Lightroom, you need to have an .xmp file. Once you got one, you need to open Lightroom on your computer. Navigate to the area “file” and then click “Import Profiles & Presets”. A new window will open where you can choose your .xmp file. Once you are done with it you will be able to see your new preset in the preset folder.

To sum it up:
- Have a .xmp file
- Go to “file” in Lightroom
- Click “Import Profiles & Presets”
- Edit Your picture with your new preset!
Recommended: What you need to master photography
Mobile
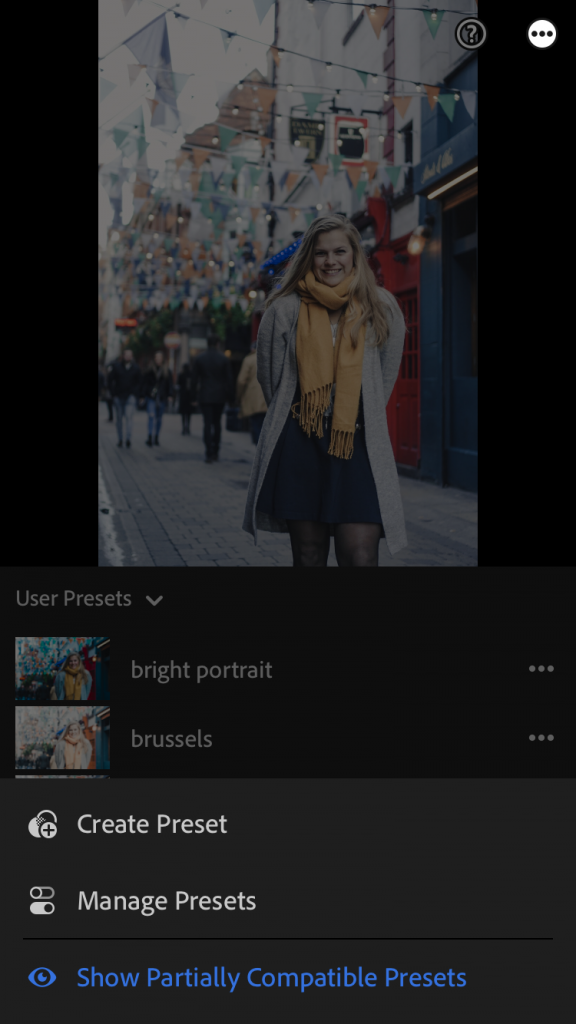
When you want to install a mobile preset you first need to have a .dng file. This basically means that you have a picture that has all the required information for the edit. First you need to copy this picture into the photo app of your phone. Now move to your lightroom app and import this .dng file. Now you have the picture with the edit in there. Simply go to the area “preset” and click on the three dots in the upper right corner. Then just click on “create preset”. Now you can use it for every possible picture!
To sum it up:
- Have .dng file
- Copy it to your photo app
- Open lightroom
- Import the dng.file
- Go to “Preset”
- Click on the upper right corner and “create preset”
Et violá! Now you are able to use the presets on your computer and your phone!


